
How to Make Popcorn Curls

Everybody loves popcorn curls. Surprisingly, they are very easy to make and only take about an hour (to make, longer to attach). You can make them to add to a loop-haired ‘kid, or you can completely reroot one, making loops and popcorns. Just keep in mind that if you do add them, or reroot, disclose this information when reselling.
I am adding them to a loop-haired Martha Nelson Thomas Original Doll Baby head.
I have videos on youtube that show how to make popcorn curls and attach them, or read below.
Materials Needed…

Size 8 (5mm) knitting needles, 10” Long (or longer if you are making extra long popcorns)
Dry Foam for Plant Arrangements
Eraser (optional but very helpful)
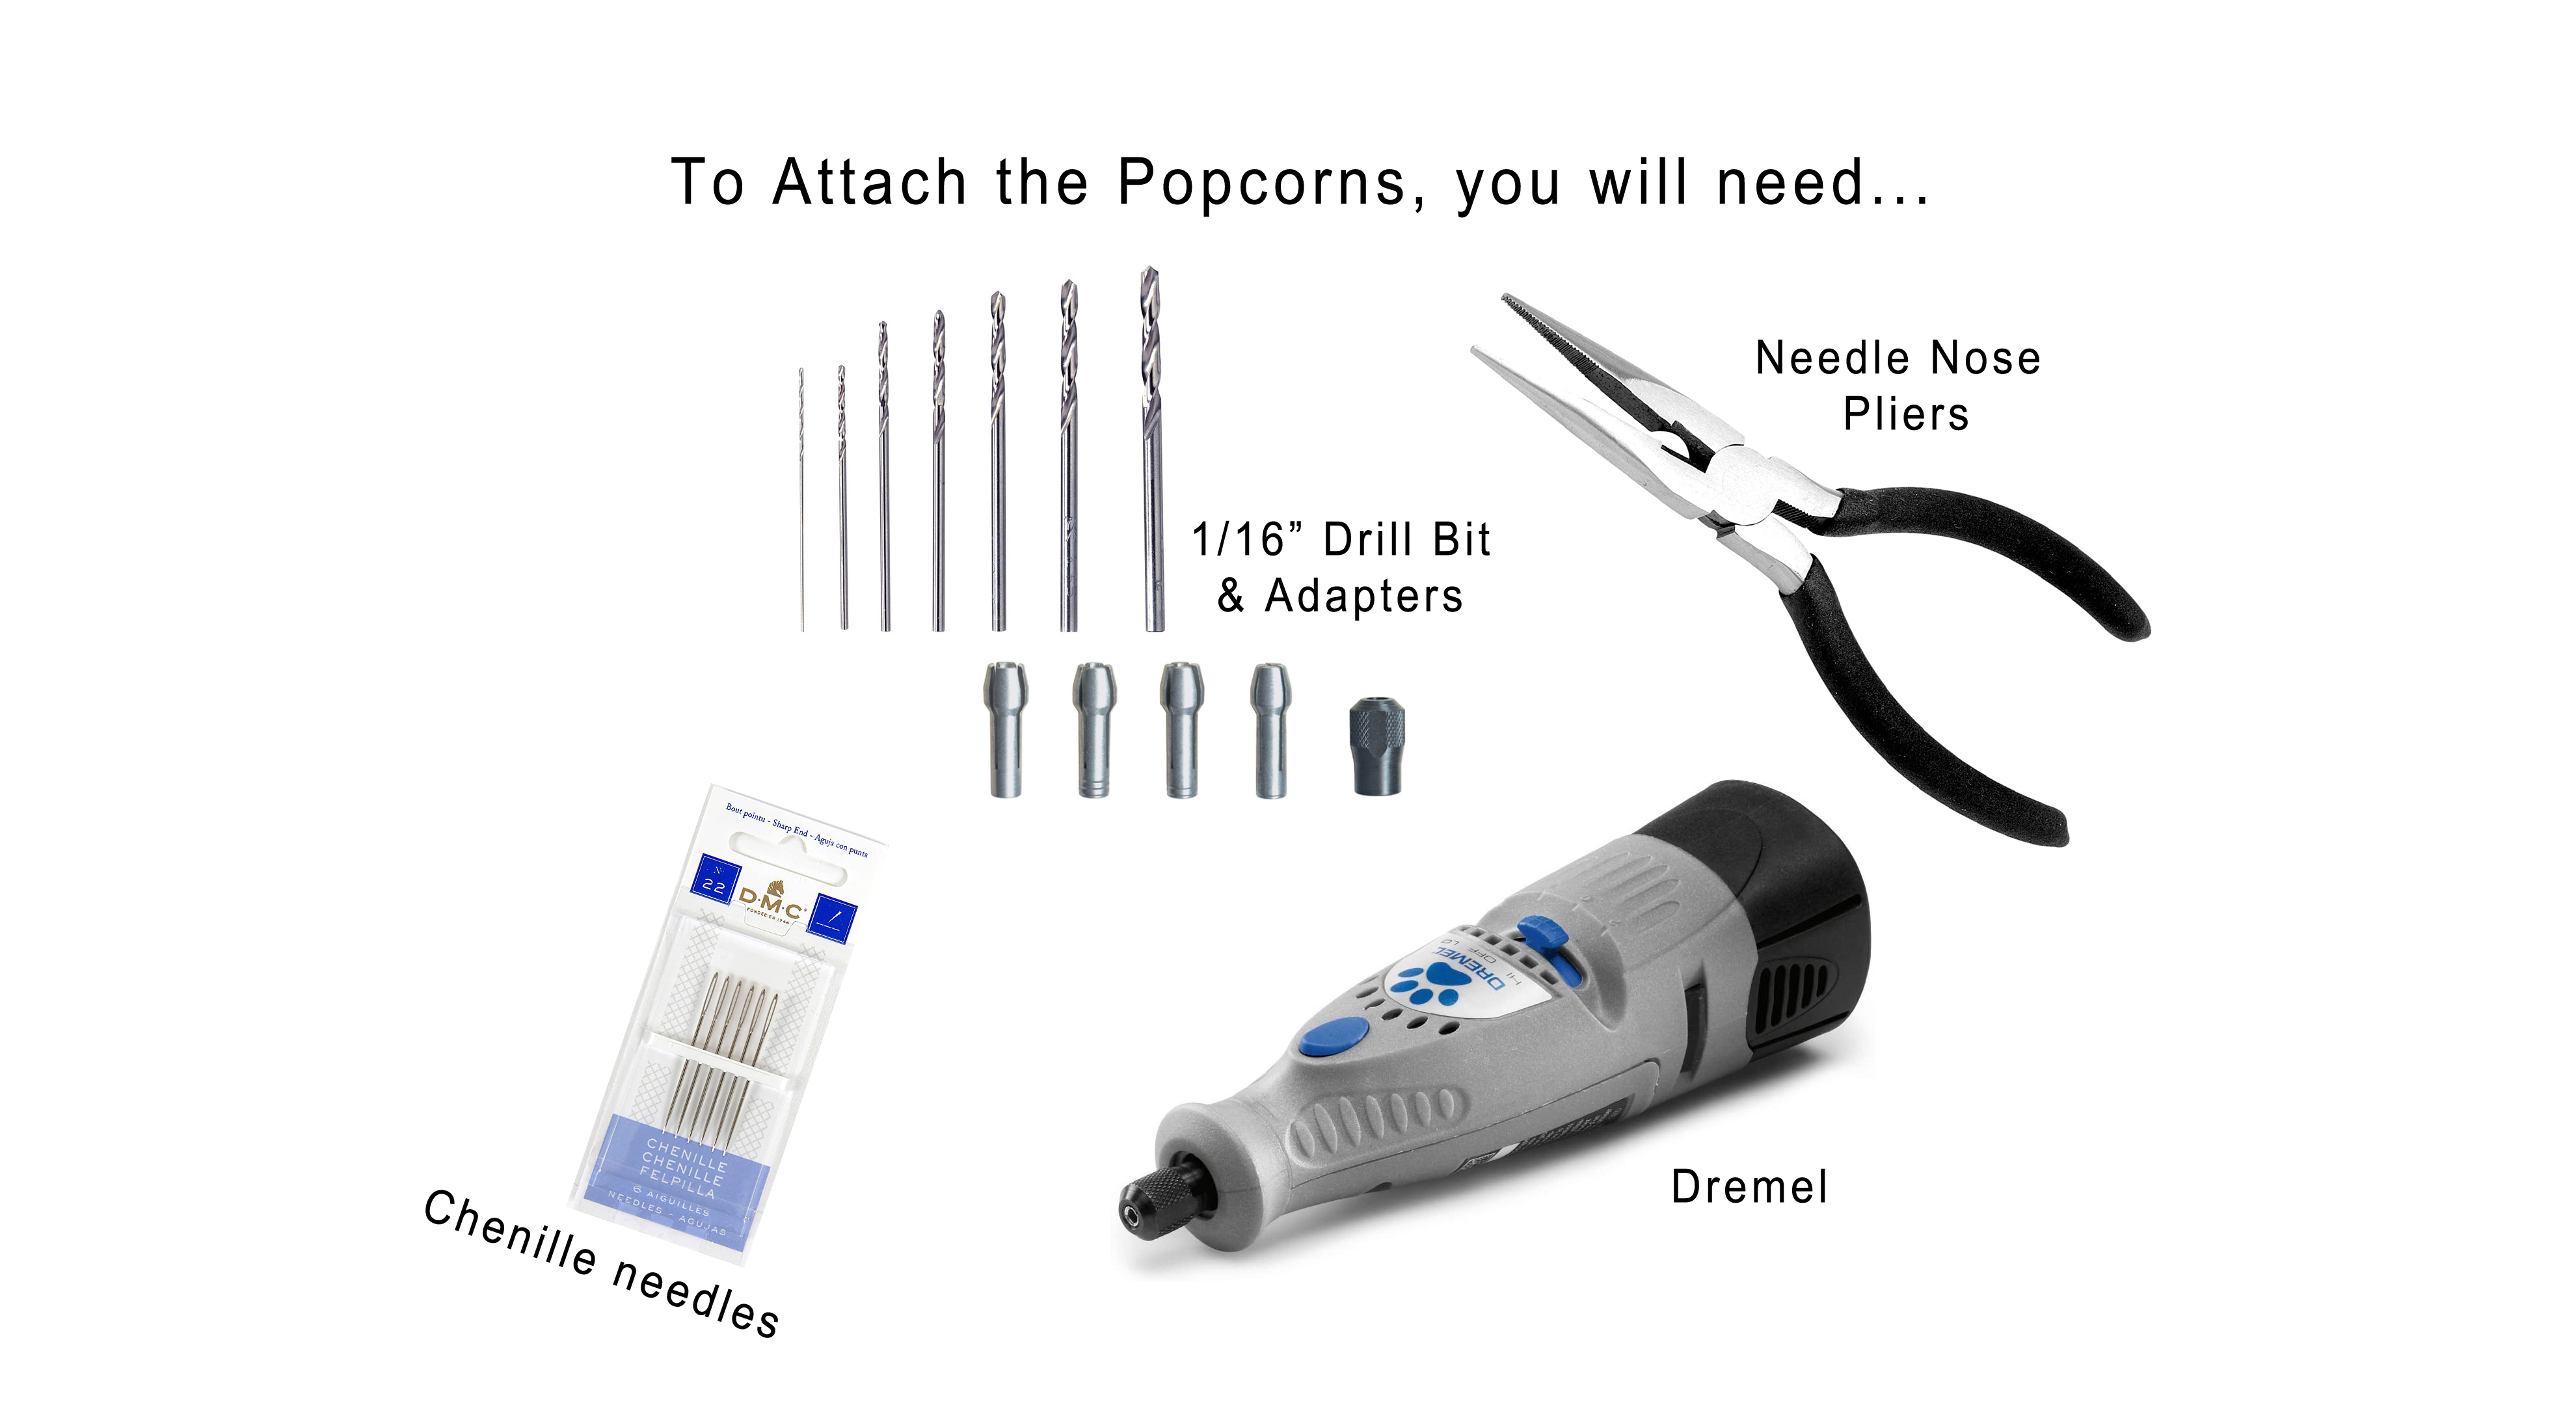
1/16” drill bit (you will need an adapter for it to fit in the Dremel)
Making the Popcorns
Step 1
Cut a piece of yarn 3 or 4 feet. You need to make sure it is long enough because it will be double the length of the popcorns you are making, plus enough to pull through the head and tie.
Step 2
Find the center of the foam and mark it. Then measure 1/2 inch to 3/4 inch away from the center on each side. If you want larger popcorns, measure further. Stick the knitting needles in the foam, pointy side up, about 3 inches through. It’s easier to work with them shorter and pull them through more as you go.

Step 3
Tie the yarn from the skein around one of the needles. Just tie once because you will be untying it when you are finished.
Step 4
Wind the yarn in figure eights around the knitting needles 3 or 4 times. I like to alternate between 3 and 4 times, so 3 times, then 4 times, then 3, etc. The more you wind before tying, the tighter the popcorn. The less you wind, the looser. 3 is almost too loose. 5 is too tight. That’s why I like to alternate between 3 and 4. But you can try it out and find out which you prefer.

Step 5
Push down the yarn you just wound. Center the piece of yarn that you cut underneath the figure eights, and tie once.

Step 6
Continue winding and tying until you get to the length you want.
Hint: To keep the needles from pulling together, cut an eraser to size and place it in between the needles. Wind the yarn, remove the eraser, push yarn down, tie, etc.

Step 7
Once you have the length you want, cut the yarn from the skein, leaving a tail about 10-12 inches long. Tie it twice with the two tails that you were using to tie in between the figure eights. This will be the end that goes in the head. Mine were about 6 inches.

Step 8
Carefully remove the popcorn from the knitting needles. Untie the end that you started with. Using a yarn needle, thread it through the two end loops and tie it, keeping the loops up so that the knot is at the base.


Step 9
Hide the yarn by inserting it inside the center, in the loops. Pull all the way through. Carefully cut it if it sticks out.

Step 10
Twist the popcorn so that the loops are even.

Determine how many popcorns you will be making. The Coleco Cabbage Patch Kids had 8 on each side of the double popcorns, and 8 in the center of the single popcorns. I only had enough yarn left from my skein to make 7 on each side. (I had used my yarn for other things, so it wasn’t a full skein.)
Attaching the Popcorns
Step 1
Find the center of the face and mark it where you want the popcorns to be. I am attaching them to a looped-hair head, so I am limited in where I can place them. I found a “bald” spot about 2 inches from the hairline. Now mark about an inch on each side of center mark. Gather the hair in a small section to show the bald spots and tie it with a small rubber band to keep it out of the way.

Step 2
Using a pencil, make even marks around the piece you just gathered.

Step 3
Using the Dremel and 1/16” drill bit and adapter, drill where you just marked. Be careful not to catch any of the yarn! It will rip it out.

Step 4
Using the Chenille needle, thread one of the strands from one of the popcorns and insert it into one of the holes. Pull it from the inside of the head with the needle nose pliers.


Step 5
Do the same with the other two threads, in the same hole. You can try pulling two of the threads in the hole at the same time, but it was too difficult for me.
Step 6
Pull each thread tight and check the popcorn to make sure it is snug on the head. Move the threads out of the way and clip them to the looped hair to keep them out of the way.
Continue doing this with the rest of the popcorns.


Step 7
When you are finished, you can tie them inside the head, or glue them. I prefer tying them. Then stuff all the thread inside. (Don’t forget to take the rubber bands out.)
Find all my patterns and doll-making supplies on etsy.com/shop/cpkdiana. Follow me on all my platforms: ✅https://www.instagram.com/cpkdiana/ ✅facebook.com/cpkdiana ✅etsy.com/shop/cpkdiana ✅https://www.ebay.com/usr/cpkdiana ✅https://www.youtube.com/cpkdianacpk ✅cpkdiana.blogspot.com