Matching with AG Courtney
I made a shirt to match with American Girl Courtney and her Graphic Sweatshirt. I posted it on IG and FB and got so many questions how I did it, I decided to share.
Materials Needed:
- Tshirt
- Printer and printer paper (optional)
- Iron-on vinyl (HTV) in colors: purple, blue, teal, black, yellow, and hot pink.
- Parchment Paper
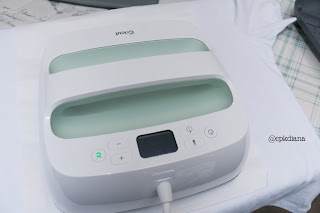
- Iron or Cricut Press
- Cutting Machine and Mat
I purchased a plain white shirt from Walmart--Free Assembly brand, 100% cotton.
I used a scanned image of Courtney's shirt to create the shapes in eCal 2 software from Craft Edge. Then I increased the size to 11 inches wide. I saved it as PNG and SVG (download on dropbox).
Instructions:
1. Prepare the shirt by ironing out any wrinkles and using a lint roller to get any lint off the shirt.
2. Print out the design on two pieces of legal (8.5x14") paper and tape them together, matching the design. Slip it underneath the shirt where you will want the design to be.
3. Cut out the shapes, mirrored, shiny side down on the mat.
I used a Cricut Joy to cut each shape separately. In Cricut Design Space, it's a little tricky, as you might need to "hide" all shapes but the one you will be cutting. "Attach" the dots together so that they cut in the layout that they are meant to. I had to get out of the program and back into it a few times because it accidentally attached everything.
I used a Cricut Joy to cut each shape separately. In Cricut Design Space, it's a little tricky, as you might need to "hide" all shapes but the one you will be cutting. "Attach" the dots together so that they cut in the layout that they are meant to. I had to get out of the program and back into it a few times because it accidentally attached everything.
4. Weed by peeling the outer layer off, leaving the shape you want and the clear plastic.
5. First lay the large hot pink circle, blue and black circles, blue rectangle, and yellow triangle down.
6. Lay down the parchment paper.
7. Lay down and press the heat press at 315 degrees for 30 seconds.
8. Let completely cool before peeling off the clear plastic!
9. Now place the rest of the shapes on top of the others, making sure not to cover up any of the shapes you are laying down. If you need to, wait to place a shape until there are no other shapes covering the ones you are using. In other words, if you place a shape on top of the plastic, it's going to iron onto the plastic instead of the shirt. Repeat steps 6-8.
For the scrunchie, I used a 4x18" piece of hot pink fabric and 6" piece of 1/4" elastic and followed the instructions in this video: https://youtu.be/17REeULcwTI?si=XKoLFKX__GgTLMC4

.jpeg)


